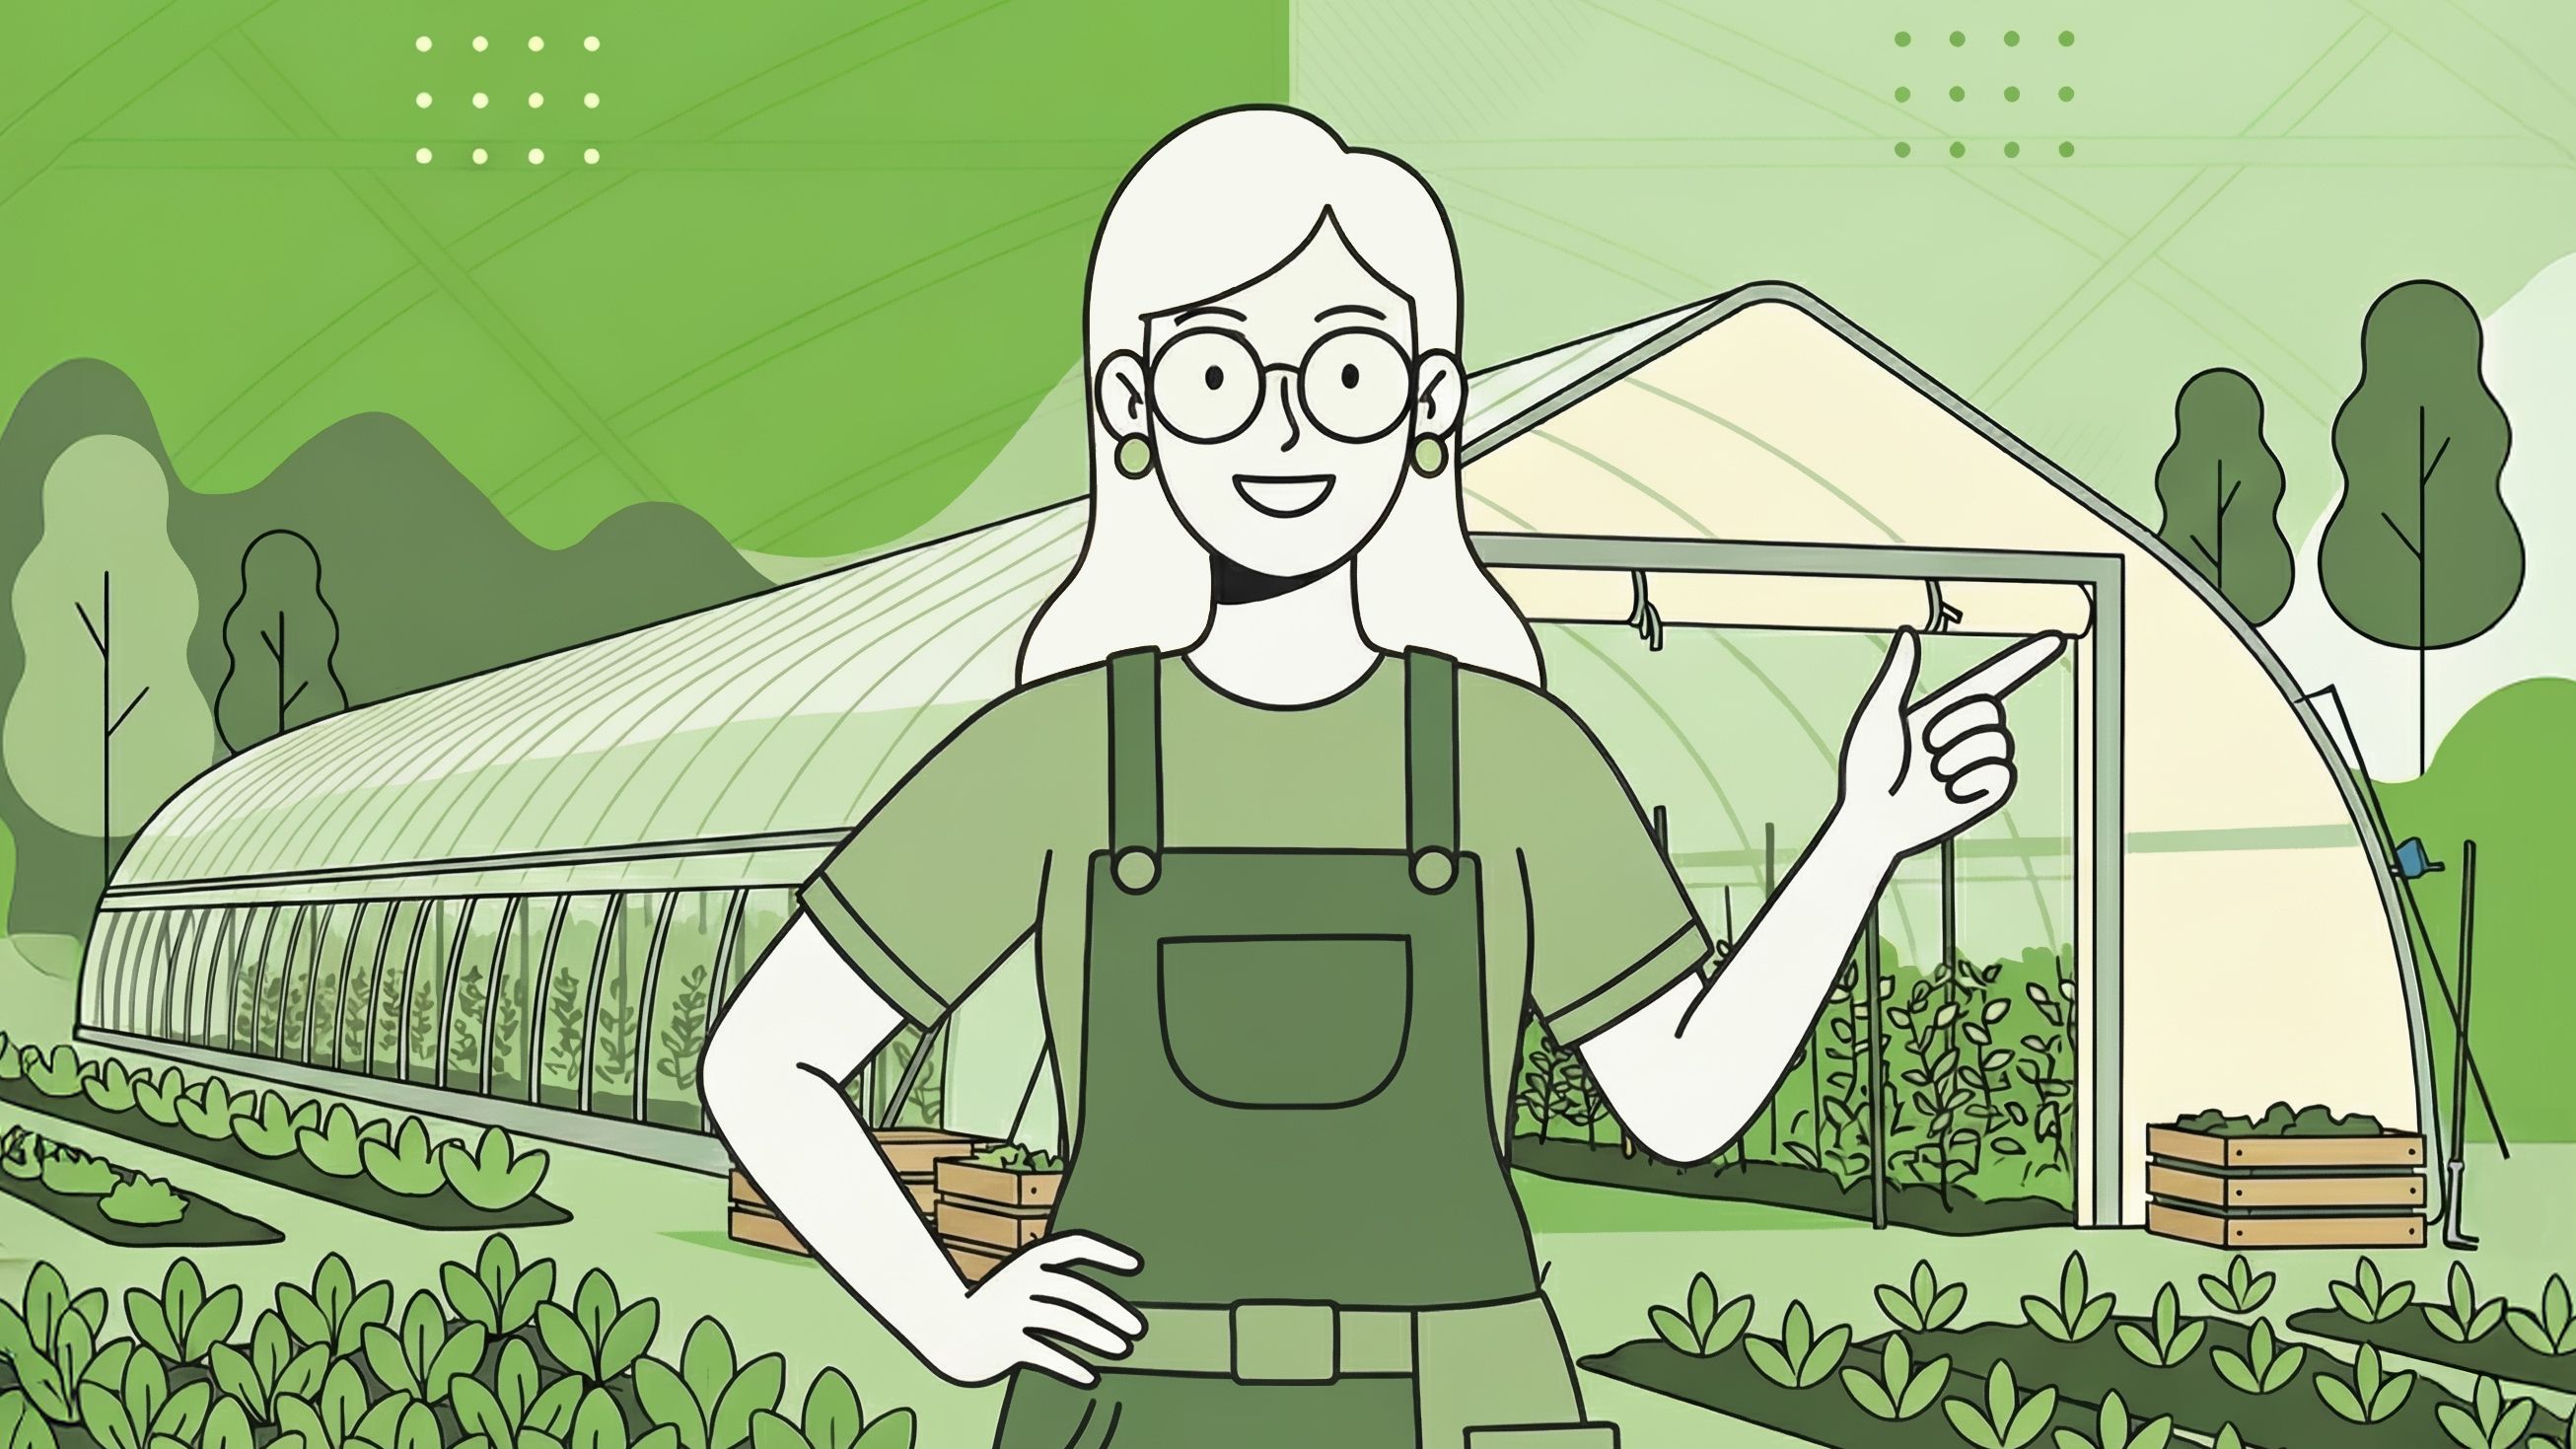
8 Common Mistakes to Avoid When Investing In Your First High-Tunnel Greenhouse
Essential tunnel shopping tips for market farmers navigating the Southern climate.
Updated on
Don’t let your tunnel become an oven for your plants or a heap of twisted metal.
In the Southern US during the hot summer, it only takes a matter of minutes to roast your crops if your tunnel isn’t properly vented.
And it only takes a matter of seconds for a severe thunderstorm to ruin months of hard work and planting.
The stakes are real when shopping for your first high tunnel greenhouse.
Covered growing space is premium ground for a small scale market farmer.
High tunnel greenhouses can be one of the most significant infrastructure investments you’ll make for your farm.
If you grow in the South, you have the threats of extreme heat, wind, and hail to think about.
So you’re probably asking yourself the question, “how do I make sure I get the right high tunnel?”
If you’re in the market for a high tunnel greenhouse (aka hoop house) and you farm in the South, this guide is for you.
Key learnings & takeaways
- High tunnels provide climate influence, not full climate control, so you must plan for heat, wind, and storms from the start.
- Structural strength and proper anchoring matter more than price or size. Underspec’d tunnels fail first in Southern weather.
- Ventilation and shade are mission-critical. Without roll-up sides and shade cloth, summer crops will not survive.
- Standardizing tunnel size and farm layout early saves major time and money as your operation scales.
- Tunnel orientation should balance even light distribution with protection from prevailing storm winds.
- Apply for NRCS EQIP funding before you buy. It can cover a significant portion of your tunnel investment and many farmers miss it entirely.
What you need to know before buying your first high tunnel greenhouse in the Southern US
High tunnels are climate influencers, not climate controllers
While high tunnels are often referred to as hoop houses or high tunnel greenhouses, there is a difference between a conventional greenhouse and a high tunnel.
Conventional greenhouses are costly, permanent structures that give you complete control of your growing climate through heating or cooling and humidity control.
High tunnels are much less expensive, sometimes portable structures that help you influence your growing climate.
They are usually made of steel hoops/bows and UV treated poly sheeting vs. traditional greenhouses which are more like steel houses made of glass or polycarbonate.
The takeaway: A high tunnel will give you affordable climate influence, but not full climate control. High tunnels give market farmers the opportunity to achieve many of the benefits of growing under cover without breaking the bank.
Which tunnel features are worth it and which aren't?
In the South, the features that matter most are 1) anchoring and structural support and 2) proper ventilation and shade.
Anchoring and structural support
As you shop for a tunnel, prioritize understanding how you will anchor your tunnel to the ground and ways you can invest in structural support for storms.
Proper Ventilation & Shade
Hot southern days are a death sentence to your crops if your high tunnel doesn’t vent well. Getting clarity on how your tunnel will vent is key to your plants’ survival.
And in the South, venting is rarely sufficient on its own. You also need shade. If you’re wanting to use your hoop house through the summer, you need to have proper shade cloth to give your crops a fighting chance of making it through the dog days of summer.
The question to ask when comparing two high tunnel greenhouses against each other?
“What specifically is included with this tunnel package?”
Not every manufacturer sells turn-key tunnels kits. Some kits require you to source some of the materials yourself.
There are three main types of high tunnel greenhouse kits:
- DIY high-tunnel greenhouse kits – you have to source some or all of the materials locally and do additional hands-on construction, like manually bending hoop bows.
- Incomplete high-tunnel greenhouse kits – you have to source some materials locally, often lumber for baseboards and hip boards
- All included, turn-key high-tunnel greenhouse kits – Everything you need is included and is ready to assemble. All Farmers Friend tunnels are turn-key kits.
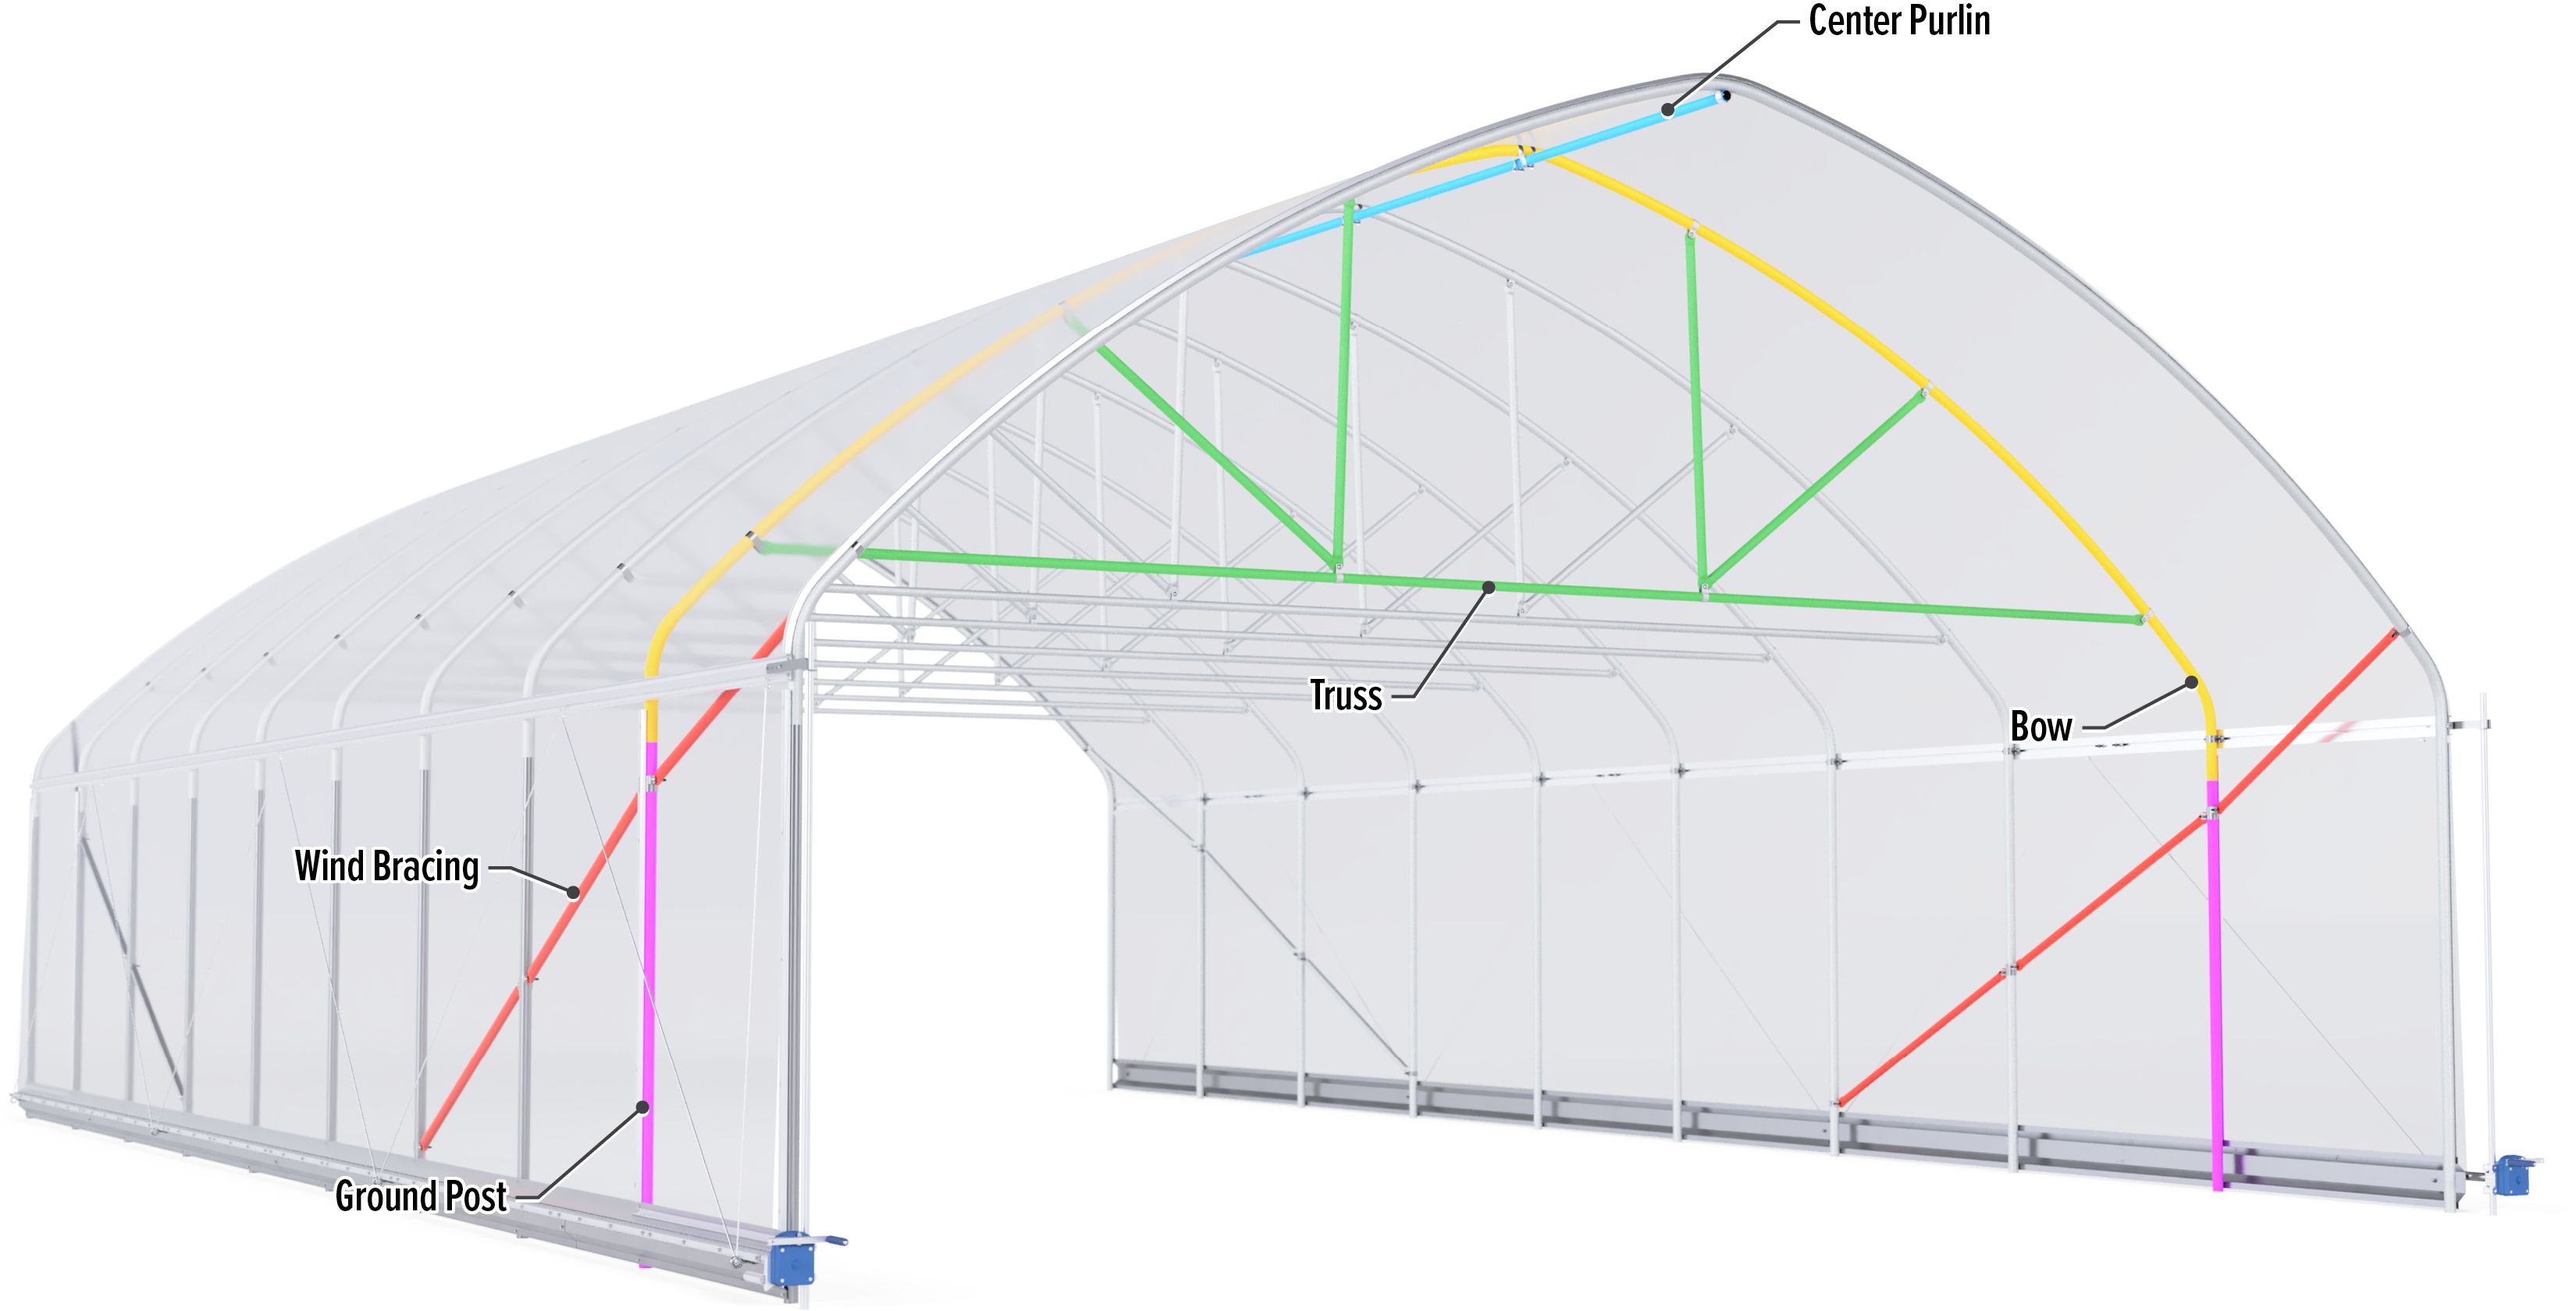
Tunnel structural terms simplified
Below is a graphic that maps out the names of tunnel structural components so you can feel more confident as a first time tunnel shopper.
The difference between a Caterpillar tunnel and a high tunnel
While both tunnel types serve to extend the growing season by trapping heat and protecting crops from wind and rain, they differ significantly in their engineering and operation.
Caterpillar Tunnel | High Tunnel (Hoop House) | |
|---|---|---|
| Permanence | Semi-permanent; easily moved | Permanent; anchored with steel ground posts |
| Ventilation | Manual (lifting plastic along the sides) | Mechanical or automated (crank-operated roll-up sides) |
| End Walls | Plastic cone tied to a stake, or a simple framed end wall. | Framed walls with doors and vents |
| Stability | Vulnerable to high winds and heavy snow (Proper installation is key) | Structurally sound; handles snow/wind well |
| Assembly | Quick (2–10 hours) | More intensive (several days to a week) |
Which one should you choose?
- Choose a Caterpillar Tunnel if: You are on a tight budget, you are on leased land, or you need to rotate your covered growing space frequently.
- Choose a High Tunnel if: You want a long-term investment, you live in an area with high winds or snow, or you want the convenience of easier venting and less maintenance.
There are a lot of great voices in the market farming industry. Farmers who’ve written books, who do podcasts, or have YouTube channels.
But when it comes to growing advice, what works in Michigan or Washington, doesn’t always work in Texas or Arkansas. Find farmers who are growing in your area and learn from them. It will move you further faster with less frustration.
Key factors to consider when buying a high tunnel for the South
This guide is divided into two sections:
- Tunnel shopping related mistakes
- Tunnel installation related mistakes
Mistake 1: The tunnel greenhouse isn’t strong enough and properly anchored to handle the wind and storms in your area
The biggest mistake you can make is going for a cheaper tunnel that’s not designed to withstand the harsh winds and storms the South can have.
The five most common areas where farmers compromise their tunnel are:
- They don’t sufficiently anchor it to the ground
- They go with wider spacing between their bows/hoops because it costs less
- They choose a cheaper, thinner steel gauge
- They don’t invest in adequate wind bracing
- They select flimsy end walls for their tunnel
Use a tautly-pulled shade cloth over your high tunnel as extra protection from hail storms. You’ll want to use a knitted polyethylene shade cloth instead of woven so it won’t unravel if it’s punctured by hail.
If your region frequently gets winds in excess of 30 mph, paying attention to steel gauge, anchoring, bracing, and support will matter a lot.
Farm Smarter, Not Harder
Join thousands of market farmers receiving regular insights on how to streamline your systems, save your back, and increase your farm’s bottom line.
Anchoring:
- Caterpillar tunnels
- Standard: The typical anchoring method is using ground posts or rebar posts.
- Recommendation: Farmers Friend recommends using the Earth-Lock Anchor Kit to secure the corners of your Caterpillar tunnel, and ¾” rebar driven 30” into the ground, delivering superior hold against wind and ground shifts.
- High Tunnels
- Standard: A common anchoring method is using ground posts, driven into the ground, sliding the bows on top of that.
- Recommendation: At Farmers Friend, we use ground posts that are driven 36” into the ground. For additional strength, you can set some or all of your ground posts in concrete. Using concrete around the posts dramatically increases the retention strength of the tunnel into the ground.
Bow spacing:
- Standard: 4 - 6 feet between bows.
- Recommendation: 4-foot spacing. This is required for most grant funding.
End wall:
- Standard: From a venting perspective, the wider the end wall opening the better.
- Recommendation: If you have regular wind, you want end walls that are framed out securely and also allow wide openings for critical summertime venting.
Bow Strength:
- Standard: Well, there isn’t much of a standard for this. You might see anything ranging from 12 gauge to 18 gauge for various parts of the tunnel and bow diameters from 1 ⅜” all the way up to 2 ⅜” or higher.
- Recommendation: 14 gauge for bows and ground posts, and 16 or 17 gauge for purlins and other braces. Just keep in mind that the smaller gauge numbers = thicker steel. Also, keep in mind that the bow diameter is equally as important as gauge for bow strength.
The takeaway: As you shop tunnels, use this guide to thoroughly compare each manufactures’ tunnel anchoring and structural supports quality. This is a necessity if you farm in the Southern United States!
Farmers Friend pioneered an industry-first! A 5-year storm damage warranty on all Caterpillar Tunnels and a 10-year storm damage warranty on all high tunnels. Learn more about our high tunnel storm damage warranty
Mistake 2: Poor high tunnel ventilation and temperature management can kill your crops
How can you ensure your new tunnel is “climate-fit” for the Southern US? Ask yourself this question before you click purchase:
How am I going to vent this tunnel on hot days?
High tunnels are passively heated. If it’s a sunny day, temperatures can get plant-deadly in your tunnel if you’re not venting it.
There are three common types of sides for high tunnels: push-up and roll-up.
- Push-up sides are what you have on caterpillar tunnels. This is usually the cheapest kind of side, but requires the most manual involvement to push them up and pull them down to vent.
- Roll-up sides are more expensive, but dramatically cut the time it takes to vent your tunnel. Some of them even have the option to be automated if you’re wanting to get real hands off.
- Ridge vents open the peak of your tunnel down the full length and combined with roll-up sides, create amazing ventilation. The downsides are cost and added complexity when building the tunnel.
Shade Cloth Is Essential – Because of how hot hoop houses can get in hot summer climates, if you’re growing where your summers consistently get about 80ºF, you need shade cloth over your tunnel. Regardless of how well you vent them, they just get too hot for your summer crops to thrive. Look for shade cloth of either 30% or 50%.
If you’re planning on having several high tunnels in the future on your farm, roll-up sides are the best long-term, time-saving strategy. But you don’t have to start with roll-up sides. Many farmers will get their first caterpillar tunnels with push-up sides to save on cost and upgrade as the business grows.
The takeaway: Hoop houses that can’t be sufficiently vented will become brick ovens in the southern summer heat. Make sure you understand the game plan for how you’re going to vent and shade your tunnel.
Mistake 3: Buying a high tunnel without considering how it fits into your farm’s future layout
If you’re a small-scale market farmer, and this is your first high tunnel purchase, make sure you’re asking yourself the question:
What do I want my farm layout to look like in 5 years?
Ideally, you want to be standardizing your farm as early into your farming venture as possible.
Taking the time to do this can feel daunting, especially when you’re just getting started, but the investment is worth it.
Critical questions you want to consider before you purchase your tunnel
- How will the tunnel fit within how you’re standardizing your farm?
- How long and wide are your bed sizes?
- How wide will your foot paths be?
- How many beds per field?
The industry standard for small-scale vegetable market farmers is a 30” bed top with a 12” or 18” foot path.
How will the tunnel you’re looking at accommodate this standardization?
You’re likely going to end up having multiple hoop houses on your farm. If you’re planning to use your high tunnel for field growing (not as a seed house/nursery/storage, etc), select a tunnel that you’ll want to get more of as you scale your business.
You’ll waste a lot of time and resources if you don’t prioritize standardization as soon as possible.
In this video Jonathan, founder of Farmers Friend and his market farmer dad John discuss how to boost farm efficiency with smart standardization hacks.
The takeaway: Take time to think through your farm standardization plan. The sooner you do it, the better!
Mistake 4: Not applying for the NRCS EQIP High Tunnel Program to help with funding your high tunnel greenhouse
In other words, not putting your tax dollars to work for you.
The NRCS EQIP High Tunnel Program is a federal program that exists to help market farmers offset the expense of installing a new tunnel. It’s helped fund hundreds of thousands of tunnels across the country.
In many situations, market farmers can qualify for this grant assistance! Many farmers have had multiple tunnels covered by these tax dollars.
You could be leaving thousands of dollars on the table if you don’t check out this opportunity.
We’ve developed the NRCS High Tunnel Grant Guide to help market farmers step through the 7 step process to apply for this program.
Mistake 5: Not considering both light and weather when orienting your tunnel
When placing a high tunnel, many buyers focus on a single factor—usually light. Others ignore orientation altogether. The reality is that both light exposure and weather patterns matter, and the best orientation considers both at the same time.
First, the non-negotiable part: avoid shade and nearby hazards. Trees and buildings can block sunlight, compete with crops for water and nutrients, and create serious risks during storms. Limbs and debris become projectiles in high winds and are a common cause of tunnel damage.
Now, the two main orientation factors to weigh:
- Light distribution: There’s ongoing debate about whether tunnels should run north–south or east–west. Some farmers see little difference, while others—especially in the South—prefer north–south orientation for more even light distribution across beds throughout the year. This can matter more for certain crops and production systems than others.
- Prevailing winds and storms: Orientation also affects how your tunnel handles wind. In many regions, it’s wise to align the tunnel so the narrow end walls face prevailing storm winds, reducing sidewall pressure and uplift forces. A tunnel that’s poorly oriented for local wind patterns is more likely to experience plastic failure, end-wall damage, or structural stress during severe weather.
The right orientation is usually a compromise:
- Maximize usable, even light
- Minimize exposure to damaging winds
- Fit within how your farm is laid out and standardized
This is a situation where talking with local growers is extremely valuable. Ask what orientation they’ve used, what storms they’ve endured, and what they would change if installing again.
The takeaway: tunnel orientation isn’t just about plant growth or storm survival—it’s about finding the best balance for your location, crops, and risk tolerance.
Mistake 6: Installing your greenhouse plastic incorrectly will cause you headaches
One of the nuances of building your high tunnel greenhouse is installing the plastic correctly.
If the plastic isn’t stretched tight enough, the wind will catch it and flap it against the bows causing damage to your plastic and shortening its lifespan.
If the plastic is overstretched, it will develop weakness along stress points that will tear or rip.
You’ll spend a lot of time and money on greenhouse patching tape trying to extend the life of poorly installed plastic. Do it right the first time and save yourself the headache.
The good rule of thumb is:
Pull out the wrinkles, but don't pull out the life.
The best time to install: aim for a calm day when the temperature is between 60°F and 75°F. If you install it when it's too cold, the plastic will sag and flap like a sail as soon as the sun hits it. If you install when it's too hot, you are at the highest risk of overstretching.
Greenhouse plastic is rated to last up to 4 years. But you can at times get 5-7 years out of it before you have to replace. When the plastic becomes too opaque or has a “whitish filmy” look, it’s a good indicator that it’s time to replace the plastic. As your greenhouse plastic ages it lets in less sunlight so it’s something you want to pay attention to.
In this video Jonathan and his dad John share best practices for greenhouse plastic installation and/or reinstallation.
The Takeaway:
Installing your plastic correctly will result in achieving the greatest lifespan from your plastic and saving your time and money down the road.
Mistake 7: Not having an irrigation or drainage plan
When you’re growing under a tunnel, you’re not getting rain water on your plants. This can have its advantages like helping to keep your plants clean and reduce disease from chronic rain. But it also means you need to have a plan for irrigating. Ask yourself the question:
How am I going to water my plants?
The two most common irrigation systems for hoop houses are drip irrigation and overhead irrigation. For crops that do better without getting wet, use drip. For crops that thrive being wet, do overhead.
What’s your drainage plan?
High tunnels shed a lot of water during a rainstorm. All the water running off the tunnel is going to go somewhere and, if your ground isn’t prepared to drain well, it will go into your tunnel.
There’s nothing quite like walking into your tunnel after a rain to find your plants flooded. Don’t cut corners here. Make sure the ground under your tunnel is higher than the ground around it and that water will run away from your tunnel instead of inside.
This is critical work that you’ll be glad you did before you built your tunnel. It’s a pain to try to remedy the problem after the tunnel is already standing.
The takeaway: Plants need water. You need a gameplan for how you’re going to irrigate them inside the high tunnel. Flooded plants are a problem (unless it’s rice or cranberries - neither of which we recommend growing in a tunnel). You haven’t figured out your drainage yet? Don’t build your tunnel until that’s taken care of.
Mistake 8: Underestimating that tunnel installation difficulty varies between tunnel sellers/manufacturers
You know from those frustrating toy assembly projects on Christmas morning, that not all manufacturer design or assembly instructions are created equal! And a mistake that’s easy to make is not evaluating two tunnel kits with ease-of-assembly in mind.
Questions to consider as you compare high tunnel kits from different manufacturers
- Q: How many hours will be required to set up?
- Q: How many people do I need to help me?
- Q: Are there any special tools required for installation?
- Q: How helpful are their instruction manuals?
- Q: What assembly videos exist that’ll accelerate my confidence?
Farmers Friend has developed a reputation for the high quality of our tunnel installation support materials.
Farmers Friend tunnel greenhouses come with two types of assembly instructions that make installing your new tunnel a smooth and time-efficient build.
Sample Assembly Video:
Sample Assembly & Instruction Manual:
Farmers Friend also offers regional “done for you” tunnel installation throughout a portion of the Southeast and South Central United States.
Click here for more information about tunnel installation and to request a quote.
Who is Farmers Friend and why do we care?
Hi, my name is Jonathan and I am the founder and CEO of Farmers Friend.
I grew up on our family’s market farm spending a lot of my time trying to create solutions to boring, labor-intensive jobs like harvesting spring mix by hand. I’m always on the lookout for ways to make a task easier to do.
My inventive knack is what ultimately led me to start Farmers Friend.
One of the things we innovate here at Farmers Friend are a range of tunnel greenhouses for market farmers.
Below is our line of Caterpillar Tunnels and High Tunnels, specifically geared with the market farmer in mind!
Caterpillar Tunnels
High Tunnels
Shop Related Products


In This Article
- What you need to know before buying your first high tunnel greenhouse in the Southern US
- Key factors to consider when buying a high tunnel for the South
- Mistake 1: The tunnel greenhouse isn’t strong enough and properly anchored to handle the wind and storms in your area
- Mistake 2: Poor high tunnel ventilation and temperature management can kill your crops
- Mistake 3: Buying a high tunnel without considering how it fits into your farm’s future layout
- Mistake 4: Not applying for the NRCS EQIP High Tunnel Program to help with funding your high tunnel greenhouse
- Mistake 5: Not considering both light and weather when orienting your tunnel
- Mistake 6: Installing your greenhouse plastic incorrectly will cause you headaches
- Mistake 7: Not having an irrigation or drainage plan
- Mistake 8: Underestimating that tunnel installation difficulty varies between tunnel sellers/manufacturers
- Who is Farmers Friend and why do we care?